Service supports open ID integration to simplify the agent login process. The identity providers include Google, Microsoft, and Okta. Enter your client credentials into this page and the login page will be updated to include the appropriate button.
The Open ID settings page
1 - The Microsoft OpenID integration supports two methods for authentication: open to all clients and restricted to Azure tenant IDs. In both cases, add your Azure Client ID here. Azure Client Id is the Active Directory Application Id. Client Id is the unique identifier of an application created in Active Directory. You can have many applications in an Active Directory. Each application will have a different access level. This is a required field for using Microsoft OpenID.
To limit access to only Azure users of your Azure tenant
Enter your Azure Tenant ID to limit logins to users within your Azure Tenant. When this is left blank, any Microsoft authenticated account can be connected to an iService agent. If you have agents that are not within your Azure tenant that need to login using a social account (Hotmail, etc.), leave this blank to allow them to use those accounts for authentication. This is option and is used to limit logins to your Azure tenant.
2 - Enter the Okta Client ID and domain to activate the Sign in with Okta button on your agent login page.
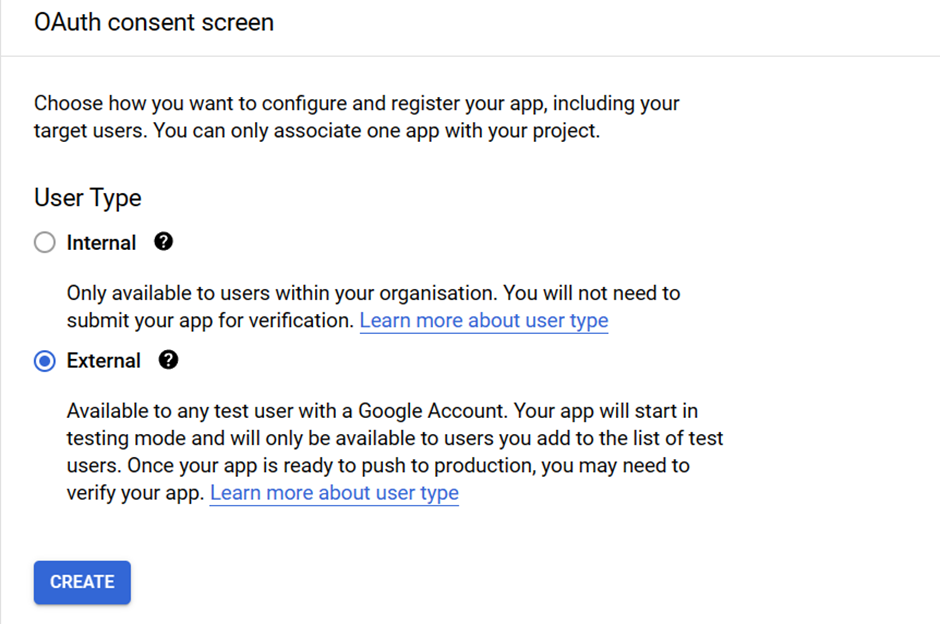
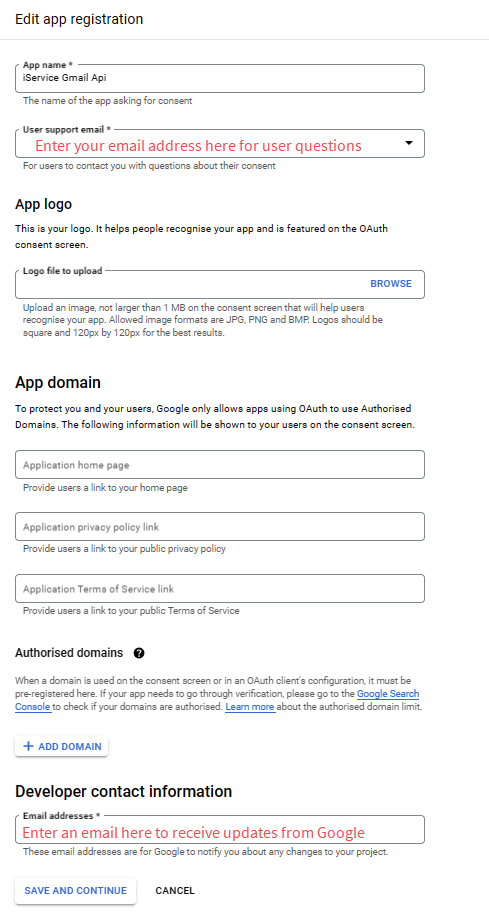
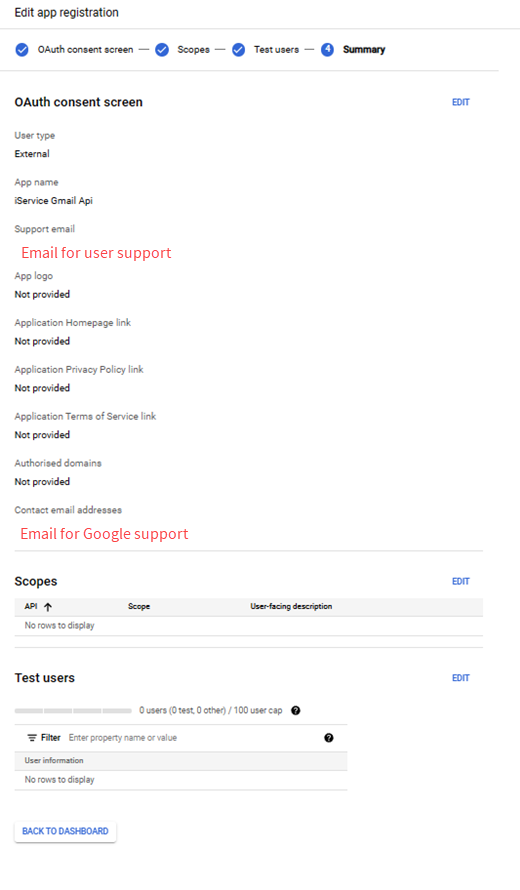
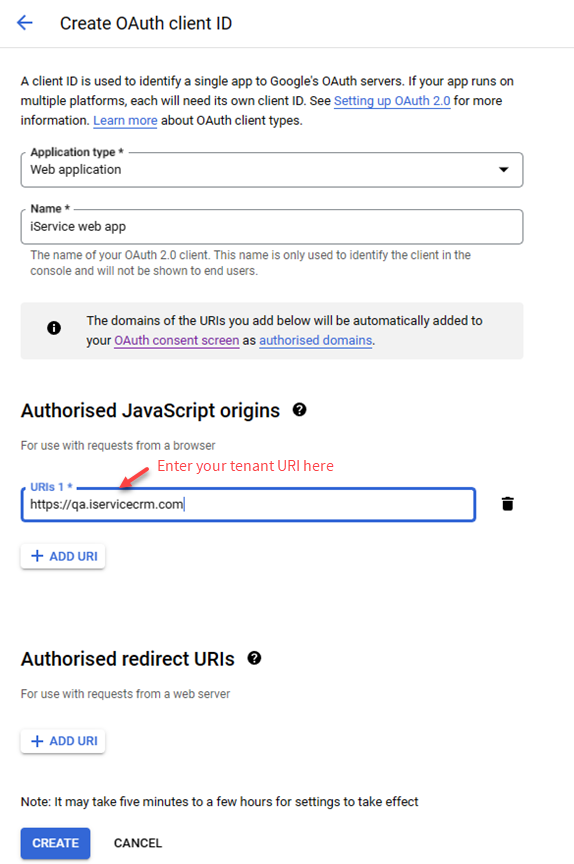
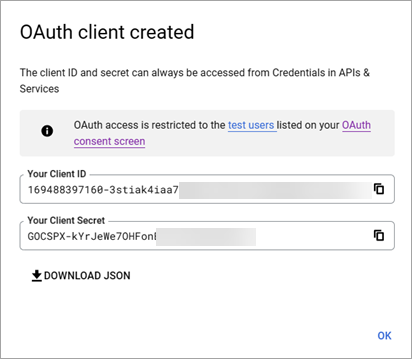
3 - Enter the Google Client ID for your company. Be sure to add the fully qualified URL for your iService tenant to your Google account.
For guidance on creating your credentials with the identify provider, see the appropriate section below.
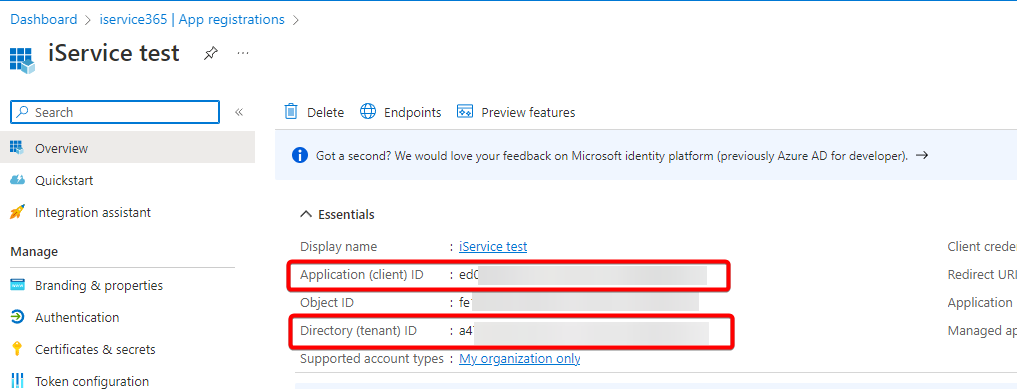
After you create it, you’ll be presented with the following properties. You’ll need to note the Application (client) ID and Directory (tenant) ID, since you’ll need to plug these into your iService tenant settings in the OpenID page.
Use the Client ID and Tenant ID from the page shown above to complete the OpenID setup described at the top of this chapter.
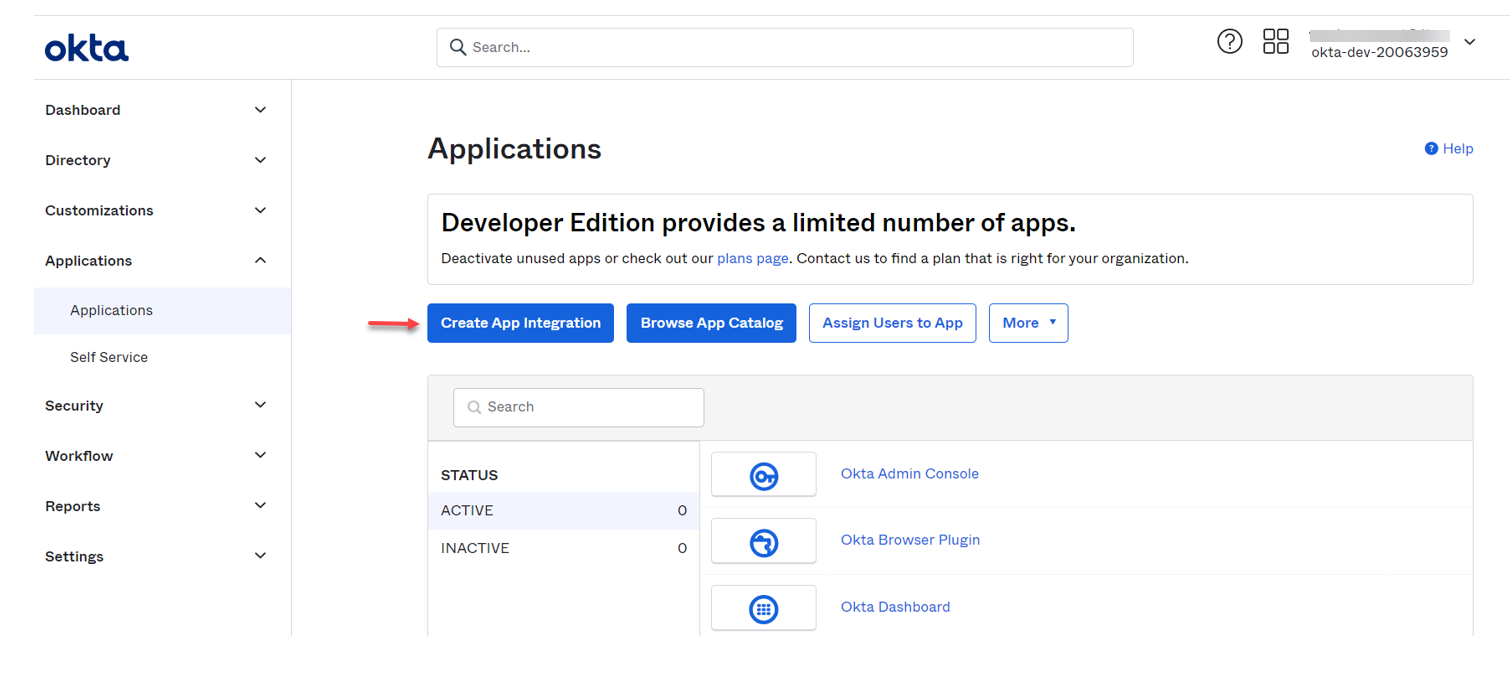
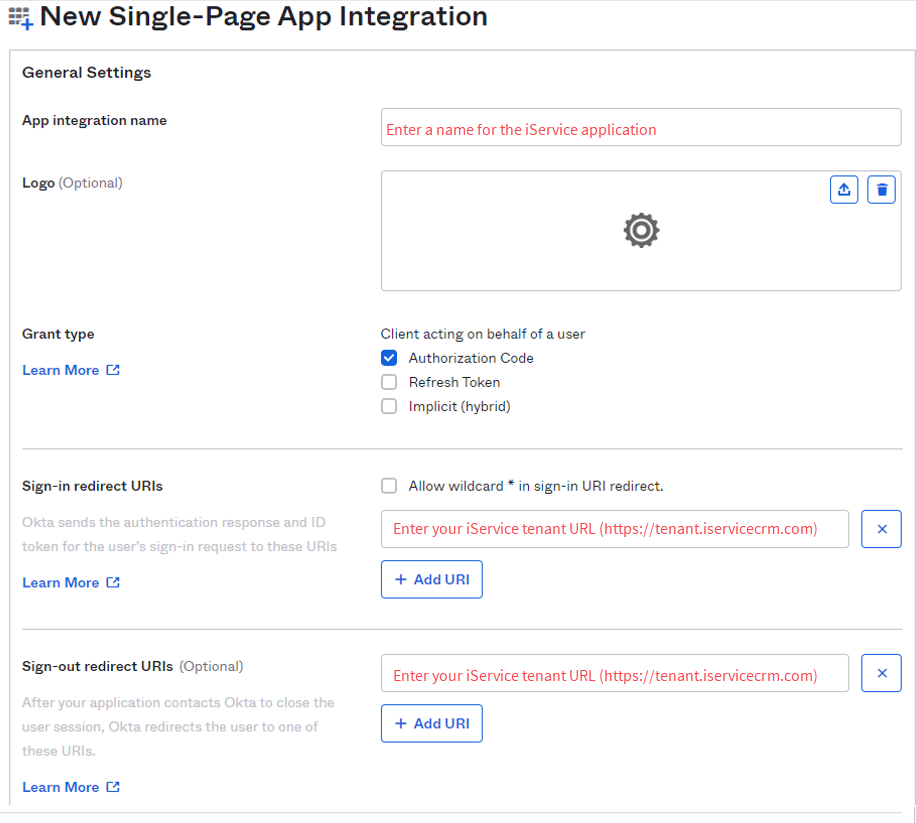
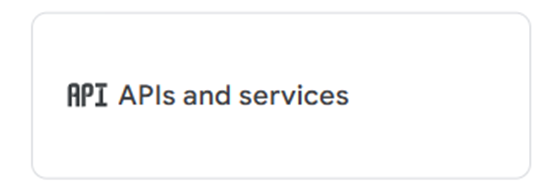
Go to Applications and click on Create App Integration.
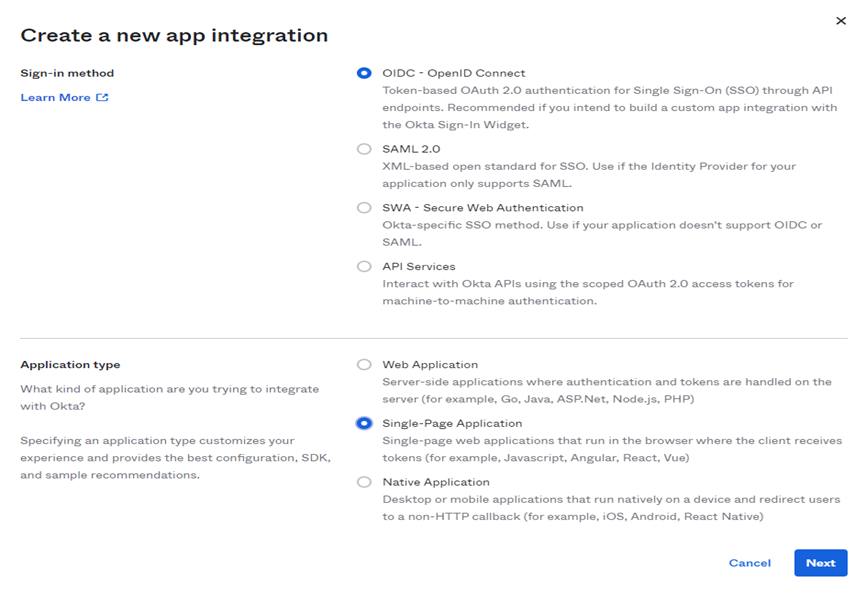
Select Sign In method as OIDC – OpenID connect and application Type as Single-Page Application.
Set application name, sign in redirect url, and sign out redirect url within the Single Page App Integration page.
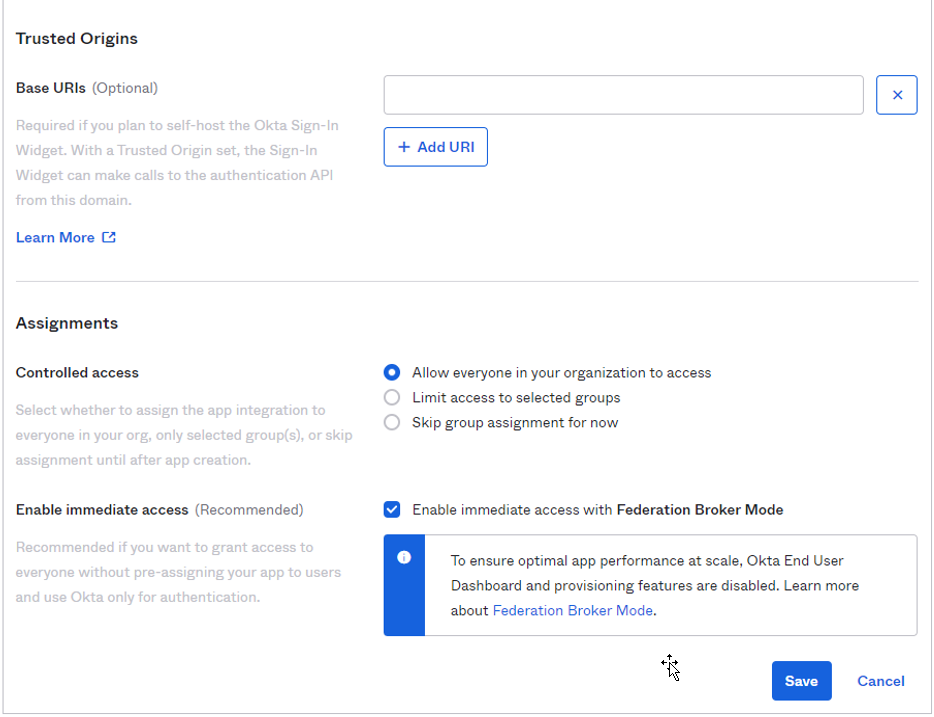
The following settings are dependent upon how your organization manages user access to applications. The example below makes the iService application available to all users in your Okta organization.
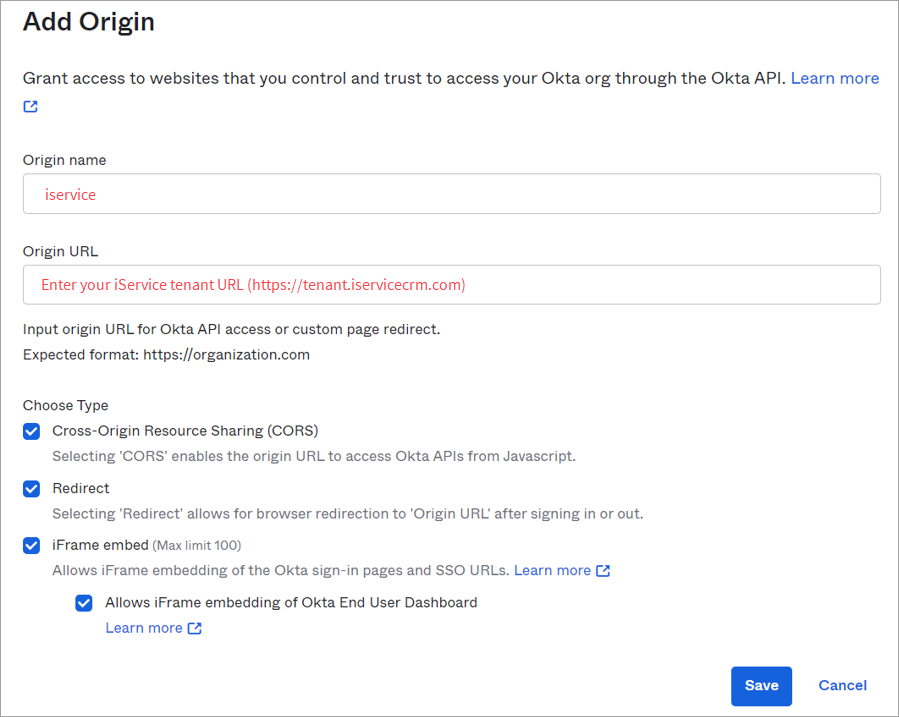
Add settings for Origin from Security > API > Trusted origins > Edit > Allow iframe
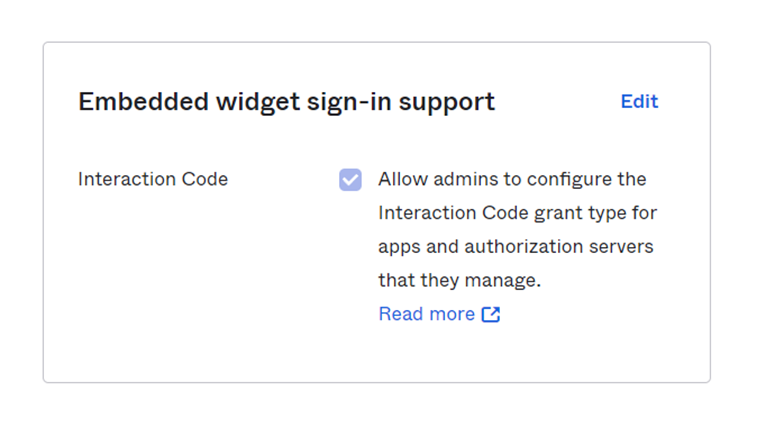
Allow Embedded widget sign-in support
Setting > account > Embedded widget sign-in support > Edit > Allow interaction code > Save
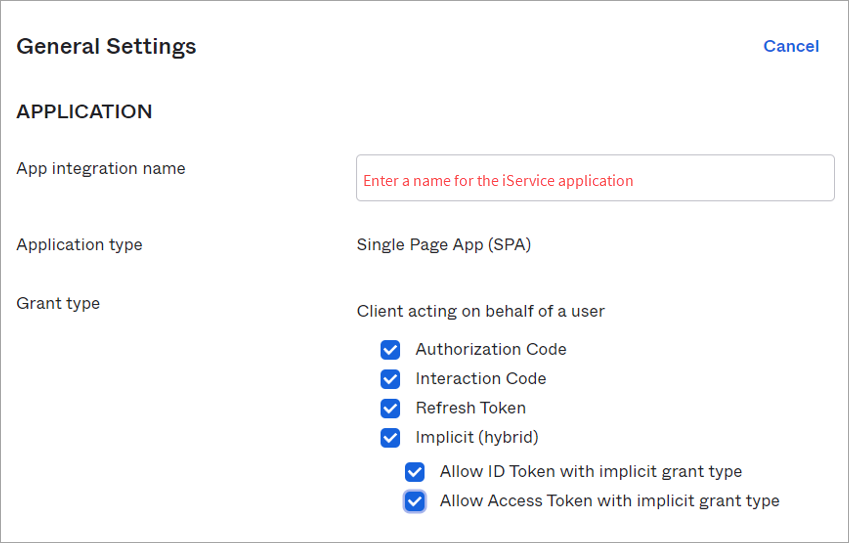
Grant type settings
Open the application General settings and Allow all the Grant type.
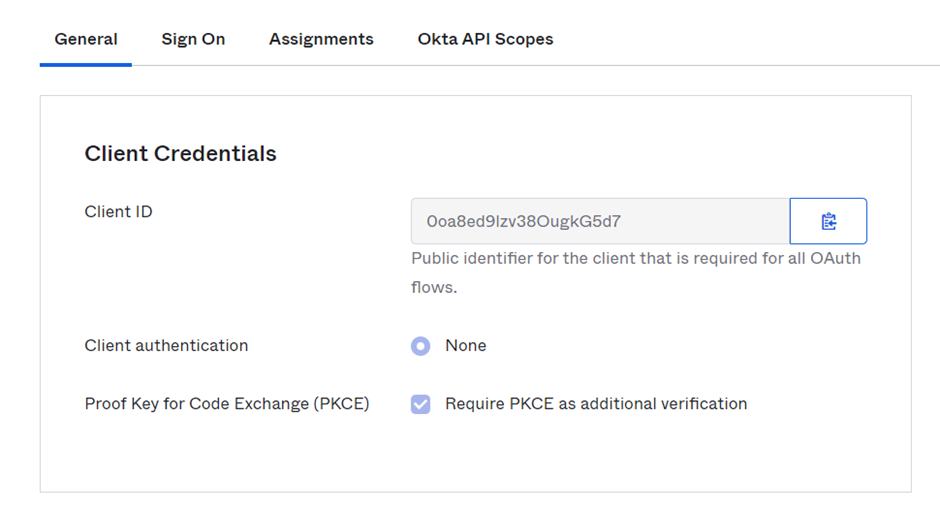
Get the application client ID.
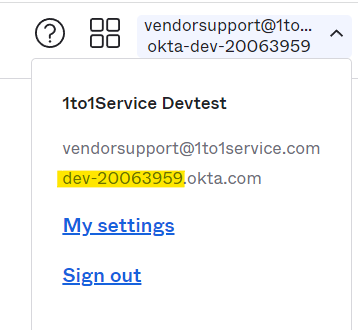
Get Okta domain in which application is registered.
Note: Do not include okta.com while copying the domain.
Use the Client ID and Domain provided by Okta to setup your integration as shown at the beginning of this chapter.
 Service supports open ID integration to simplify the agent login process. The identity providers include Google, Microsoft, and Okta. Enter your client credentials into this page and the login page will be updated to include the appropriate button.
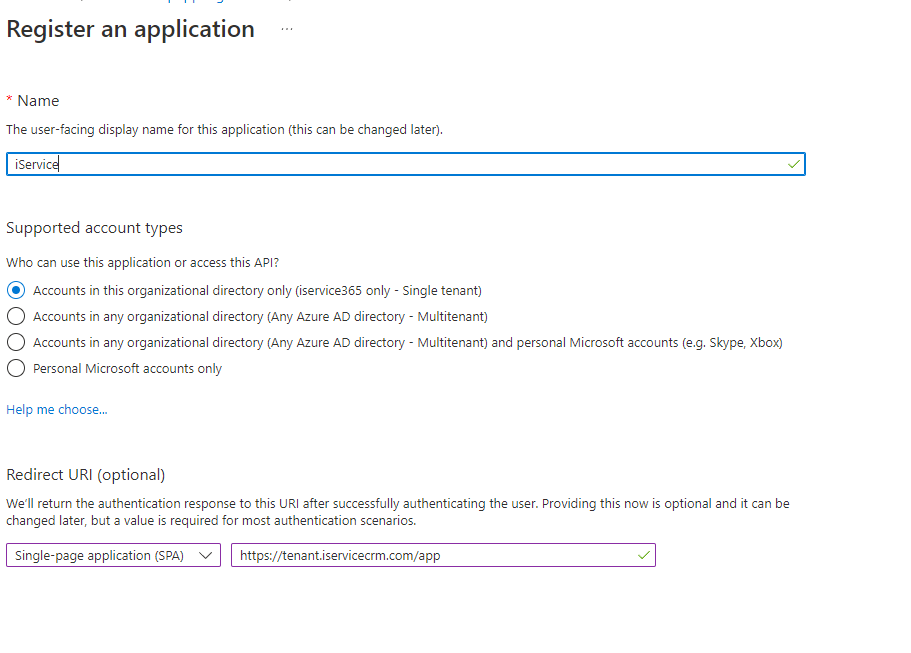
 Creating Azure credentials for iService