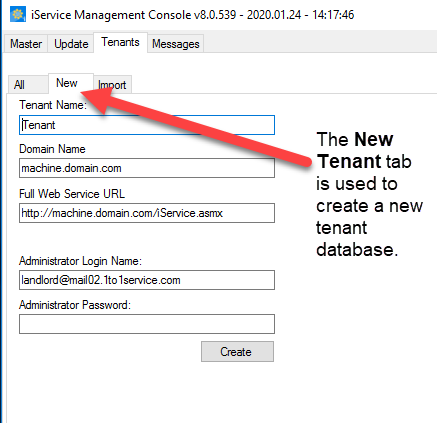
The first step in using the iService application is to create a tenant database that can be configured using the iService web interface. The Tenants tab provides a list of all tenants configured, and includes a New Tenant button for creating a new tenant and an Import button for importing tenants from other master databases.
Click New Tenant.

The New Tenant tab in the management console
To create a new tenant, basic information regarding the tenant is entered into the Landlord Administration component, including the following:
Tenant Name – This must be a unique name, and will be used for the tenant database name. The naming convention for tenant databases is masterDBname.tenantDBname.
Domain Name – The Domain Name specifies the domain where users of the iService system will login and must be unique for each tenant.
Full Web Service URL – This is the location of the web services file for the new tenant. It should typically be the domain name with http or https (as appropriate) followed by /iService.asmx (the name of the web services file).
Administrator Login Name – Enter a login name for the initial superuser of the iService website. This will be contactID = 1 within the new tenant.
Administrator Password – Enter a password for your initial superuser.
Click the Create button to create your tenant database. Once the database is created and your DNS is setup, you should be able to load the iService website and login using this administrator user ID.