iService includes an integration to the OpenAI Assistant v2 API. To add a chatbot, create an Assistant in the OpenAI Playground using the tuning options and desired model. The only value you need to create your chat bot is the ID of the Assistant you create. iService uses the Assistant v2 API in chat forms. The styling of Chatbot forms is identical to the live chat forms.
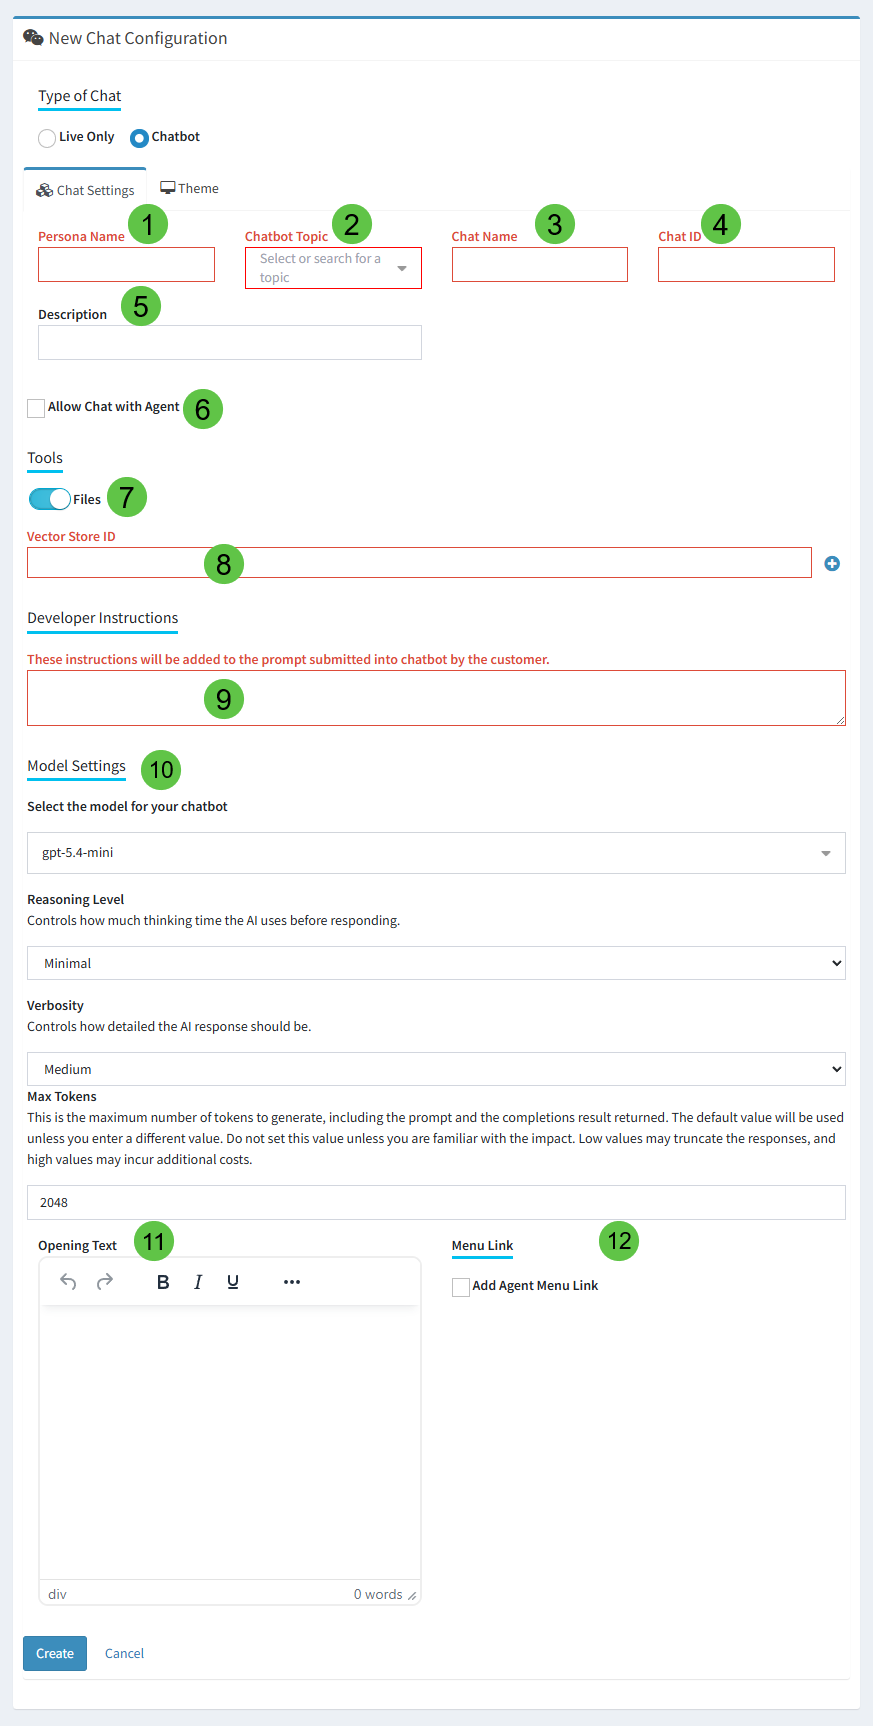
The chat functions autonomously with runtime parameters that help ensure accurate results. Chatbot interactions can be monitored like live chats, and proactively converted to live chats by agents. All chatBot interactions are saved as contact history. To create a chatbot, select Chatbot and enter the values described below.
|
Field Name |
Description |
|---|---|---|
1 |
Persona Name |
This is the name displayed for the assistant. |
2 |
Chatbot Topic |
Every interaction within iService is associated with a topic. Chat history will be associated with this topic to support business intelligence. |
3 |
Chat Name |
This is the name used as labels in the chat list, but it is also displayed within the chat window as part of the introduction. Make this a customer friendly name. |
4 |
Chat ID |
This must be a unique ID across all custom configurations in your tenant, including Workflow IDs. This value becomes part of the chat form URL (e.g., https://ex.iservicecrm.com/s/ChatID/chat) |
5 |
Description |
Add a description that explains the purpose of the chat. It can also be useful to note the locations where the chat form is embedded. For example, on the corporate website or other location. |
6 |
Allow chat with Agent |
Allow chatbot users to escalate the chat to a live chat with an agent. |
7 |
Files |
Enable the Files switch to activate use of an OpenAI vector store |
8 |
Vector Store ID |
Save the vector store ID when using files in your chatbot |
9 |
Developer Instructions |
Provide custom instructions to the chatbot for actions like referring to the company website. All iService Chatbots have built-in instructions that keep them grounded and safe. |
10 |
Model Settings |
Select your GPT model and parameters for the Chatbot. |
11 |
Opening Text |
Enter the text to display to users when they launch the chatbot. This can include images and URLs. |
12 |
Menu Link |
Add a link to the Chatbot form to the Agent menu |
Once you save your customer chat configuration the chatbot is ready to use via the Target Deployment.