iService includes two integrations to Microsoft that require separate configurations: Sign in with Microsoft and Graph API. The Sign in With Microsoft configuration is an Entra ID integration that support single sign-on using your Microsoft login credentials. The Graph API configuration is used for any mailboxes that use the Microsoft Graph API protocol for reading and sending email.
Microsoft Entra ID Integration
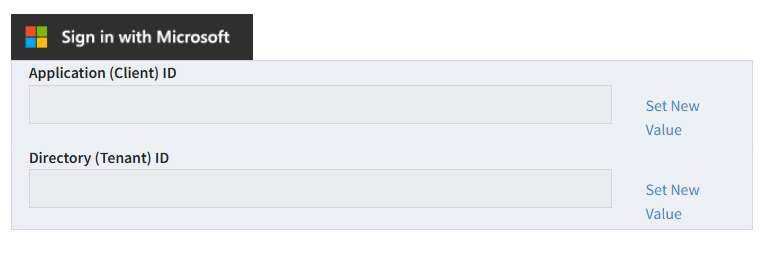
The Microsoft Entra ID integration supports two methods for authentication: personal accounts or Azure accounts. In both cases, add your Application (Client) ID here (Application ID is the Active Directory Application Id). The Application (Client) ID is the unique identifier of an application created in Active Directory. You can have many applications create within Active Directory, and each application will have a different access level that is defined in your Azure tenant. This is a required field for using both methods of Microsoft Entra ID authentication. When the Application (Client) ID is used without the Directory (Tenant) ID, agents can use any Microsoft account for authentication (including personal accounts like Hotmail).
Add the Directory (Tenant) ID to limit access to your Azure users
You can limit agents to their Azure login by adding your Directory (Tenant) ID.
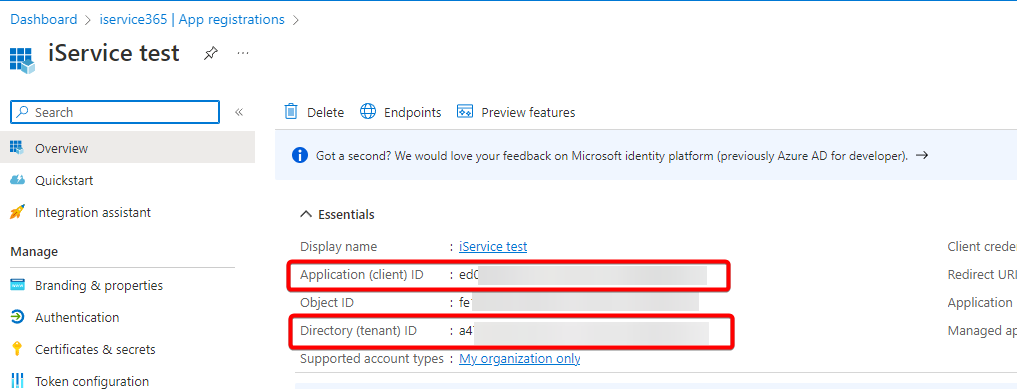
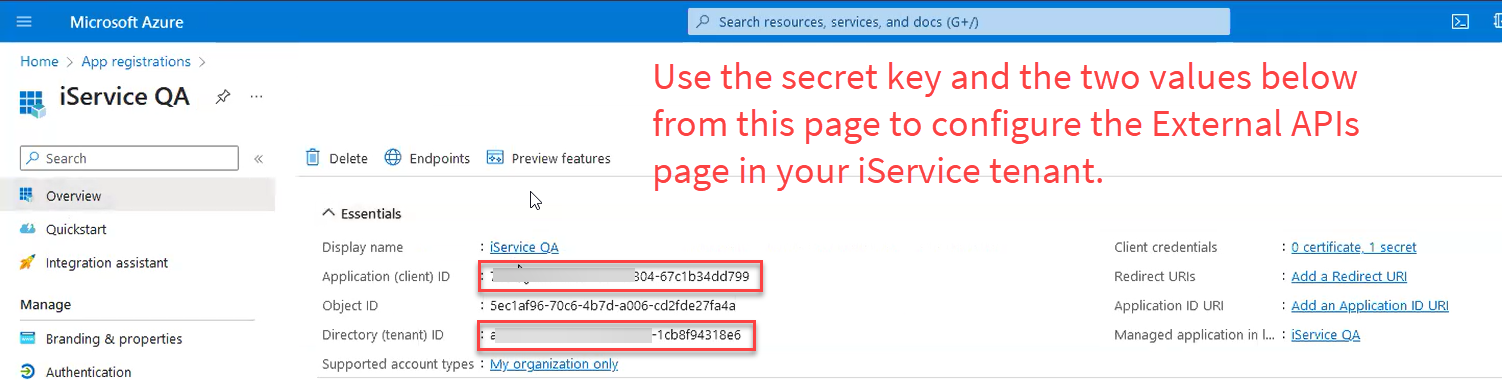
After you create it, you’ll be presented with the following properties. You’ll need to note the Application (client) ID and Directory (tenant) ID, since you’ll need to plug these into your iService tenant settings in the Entra ID page.
Use the Client ID and Tenant ID from the page shown above to complete the Entra ID setup described at the top of this chapter.
Microsoft Graph API Integration
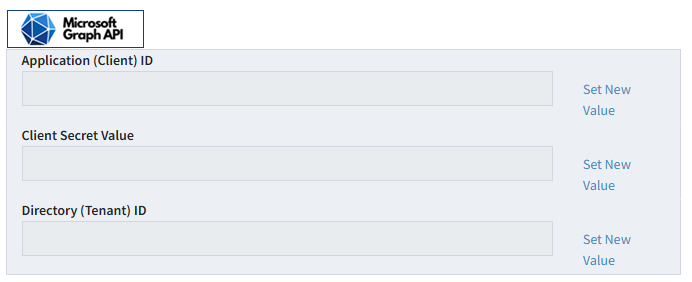
Microsoft Graph API mailboxes are configured differently from other protocols. For other protocols, user credentials are entered for each mailbox configuration. For Graph API mailboxes, however, you enter your security credentials in the External APIs page only. The credentials are not entered in the Segment Mailbox configurations pages. When using Graph API, the first step is to create an application within your Azure configuration that will contain the various mailboxes. You will use the values created from that setup to complete the settings shown above.
The Graph API integration values must be entered before any of your Graph API mailboxes may be configured.
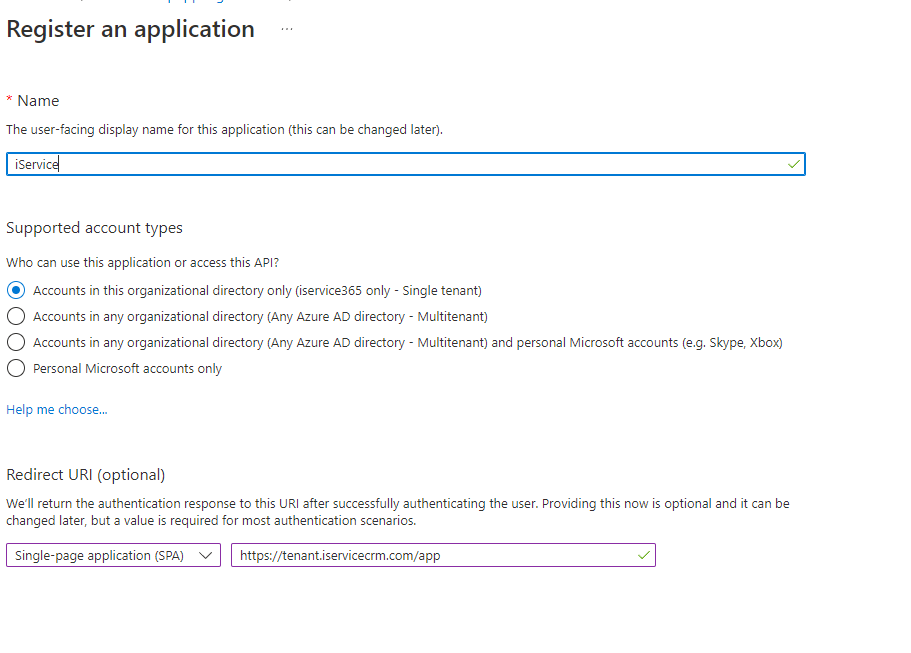
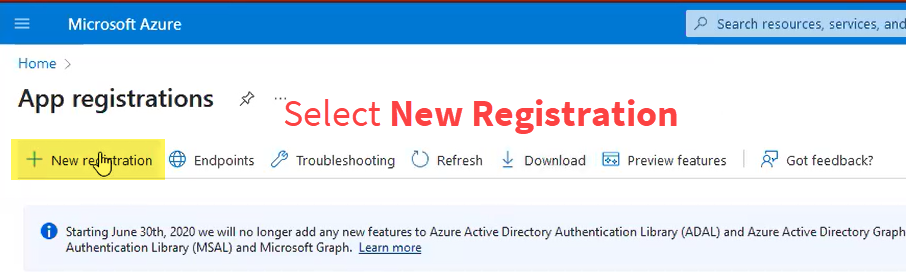
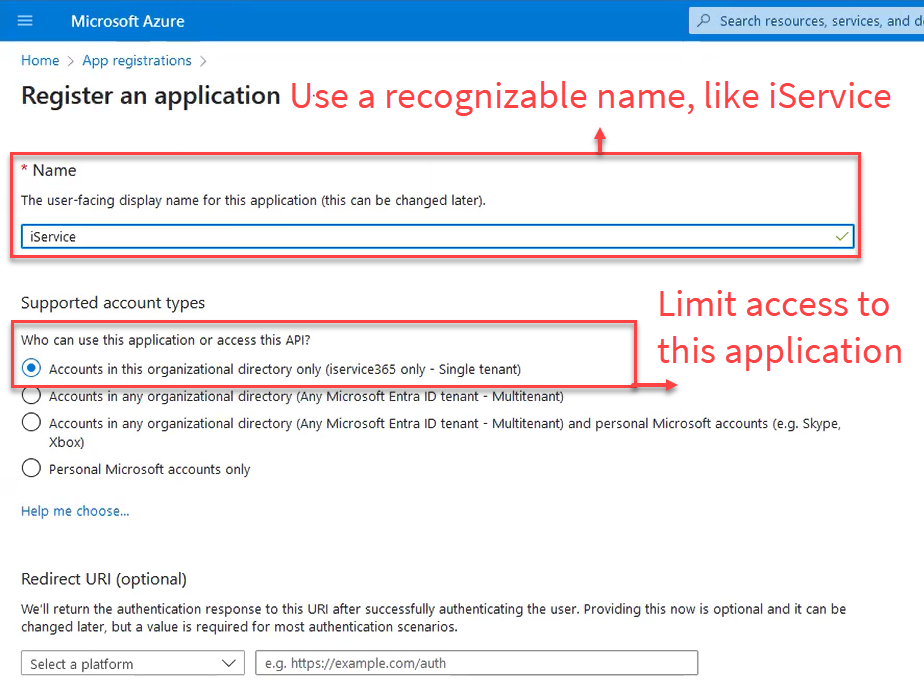
After you log into Azure, navigate to Applications and click New Application.
Enter a name that others will recognize, like iService. Set the scope of the application so it limits access to account in this organizational directory. You do not need to enter a value for the Redirect URI.
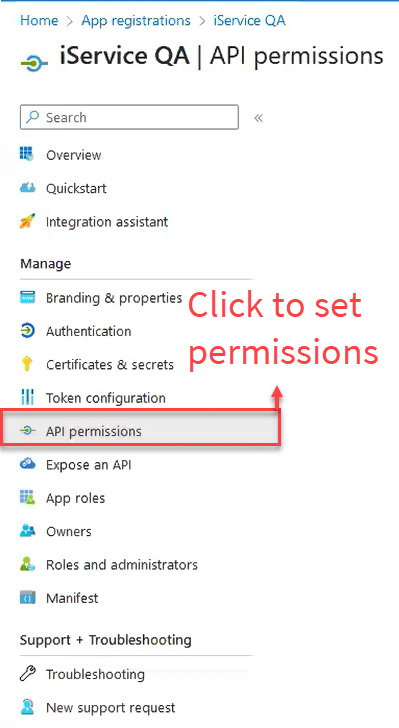
When you save your app, navigate to API Permissions.
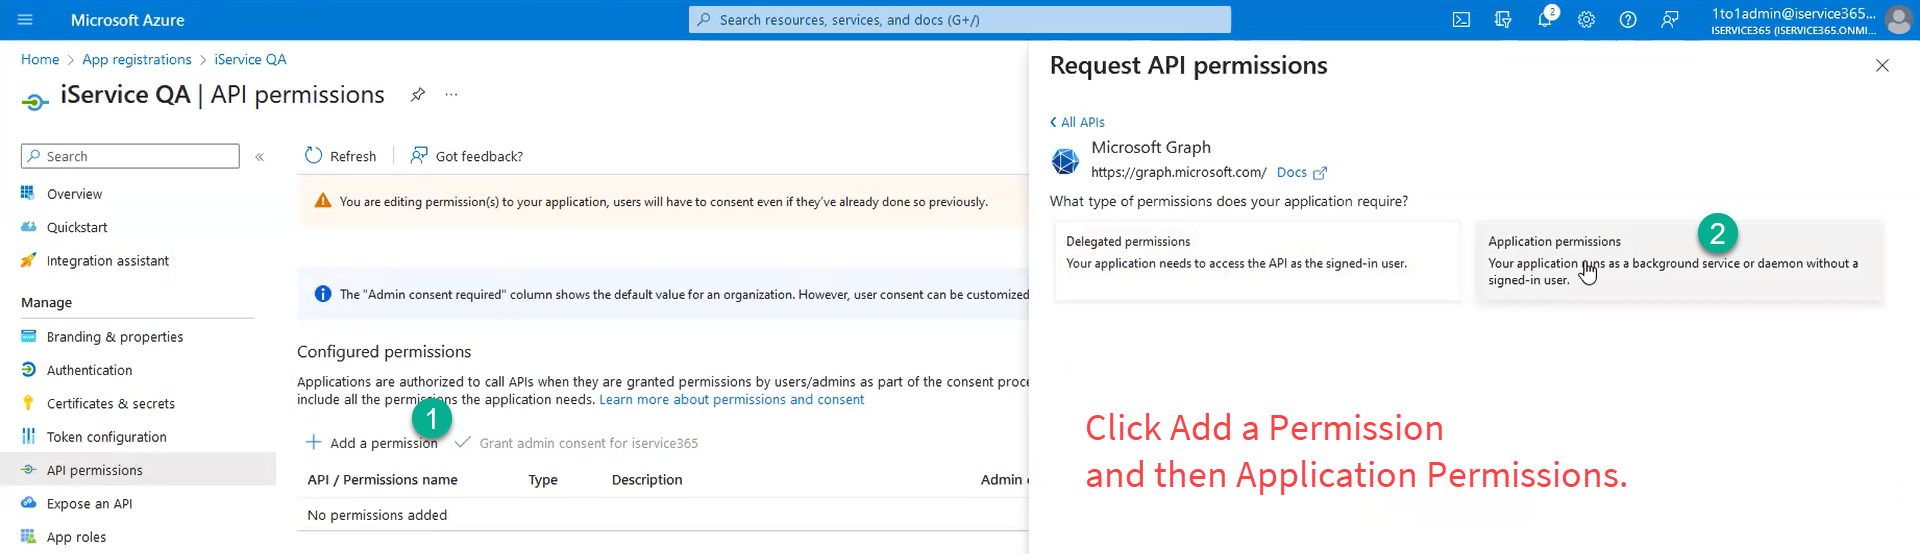
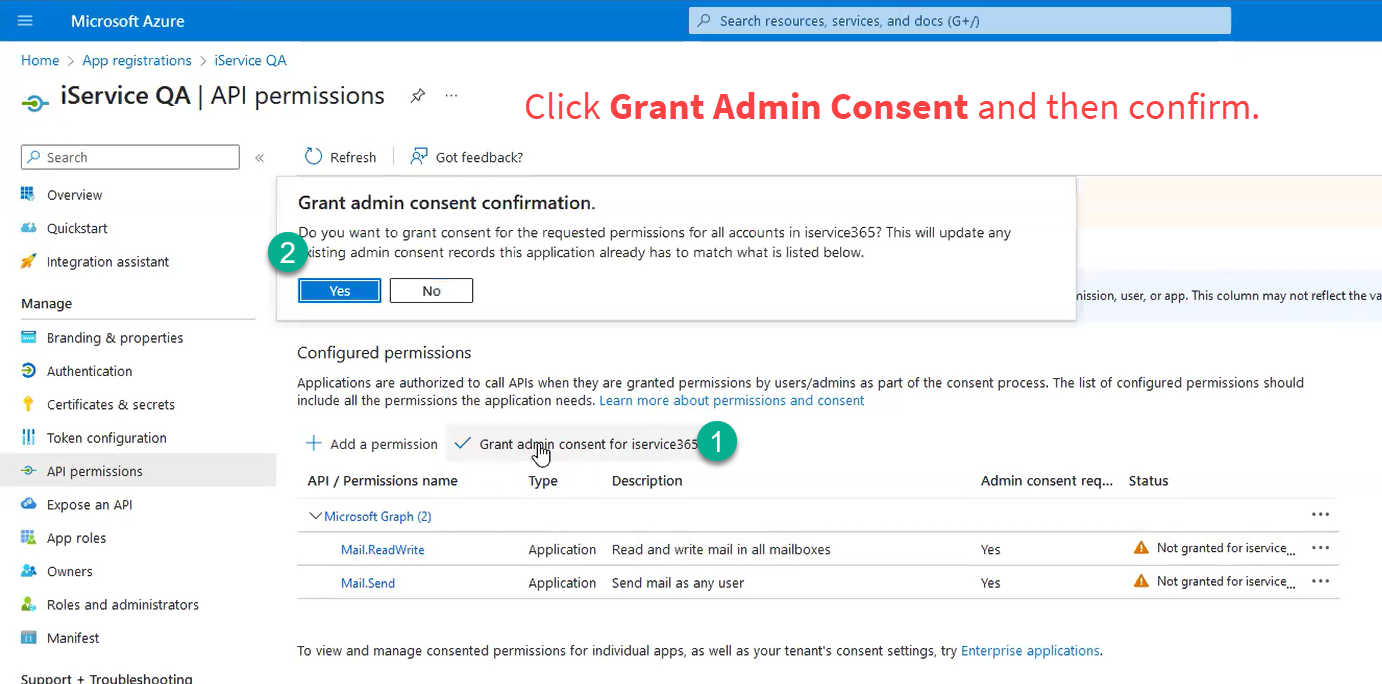
Click Add a permission and then select Application Permissions.
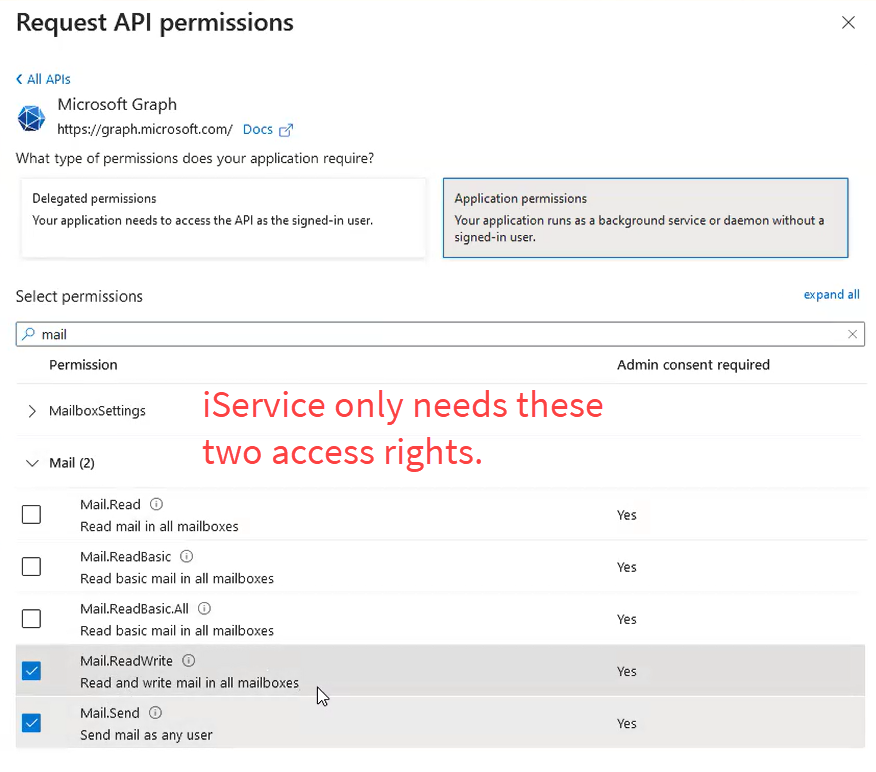
Your application should only have the two permissions shown below (Mail.ReadWrite and Mail.Send).
After you add the permissions, you must Grant Admin Consent for the permissions. Click on Grant admin consent to open the dialog box and the select Yes.
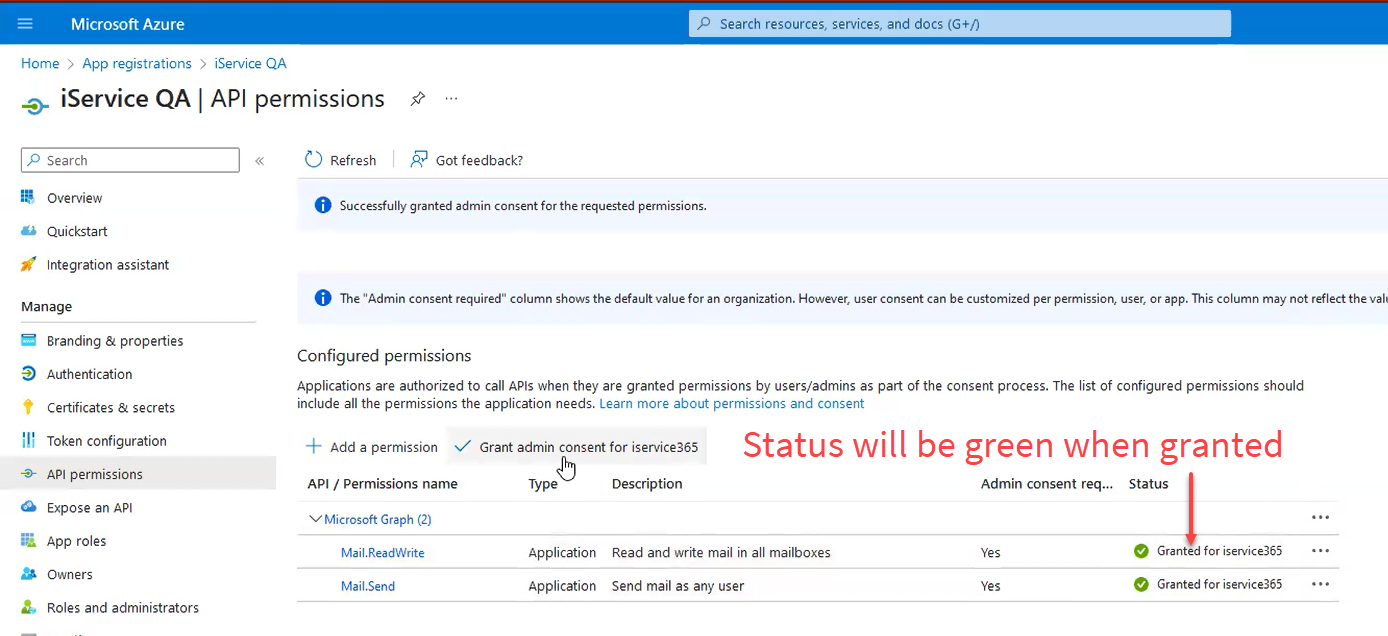
After you grant admin consent, the status will turn green.
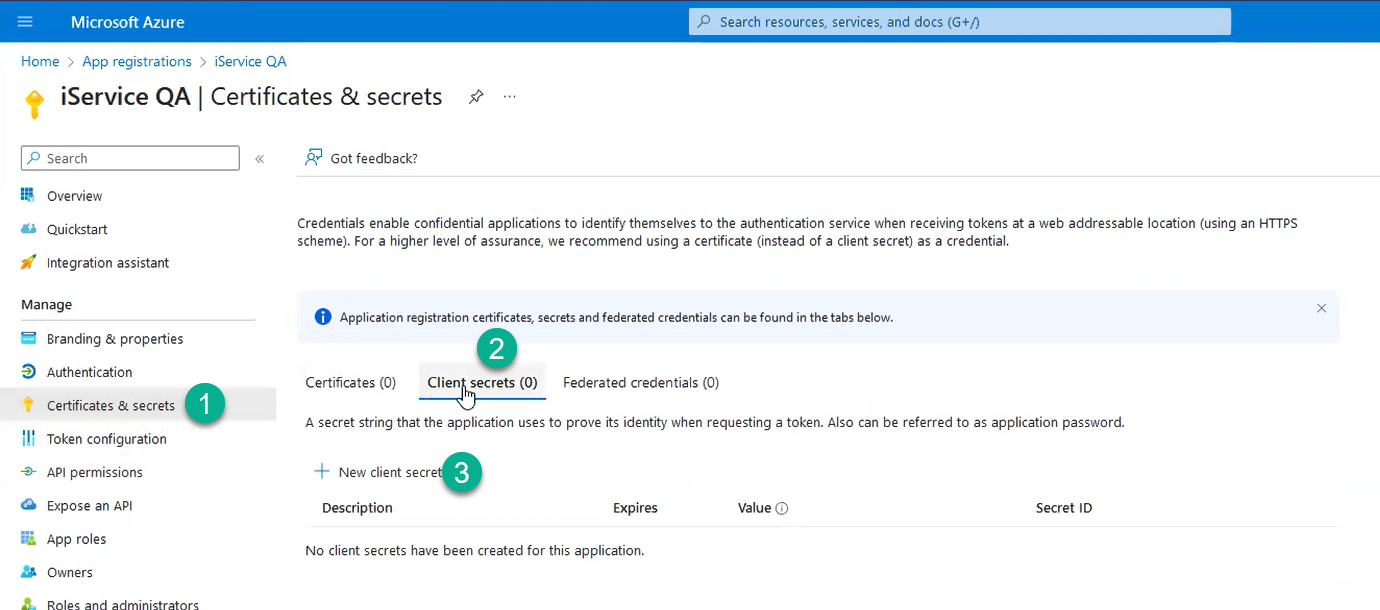
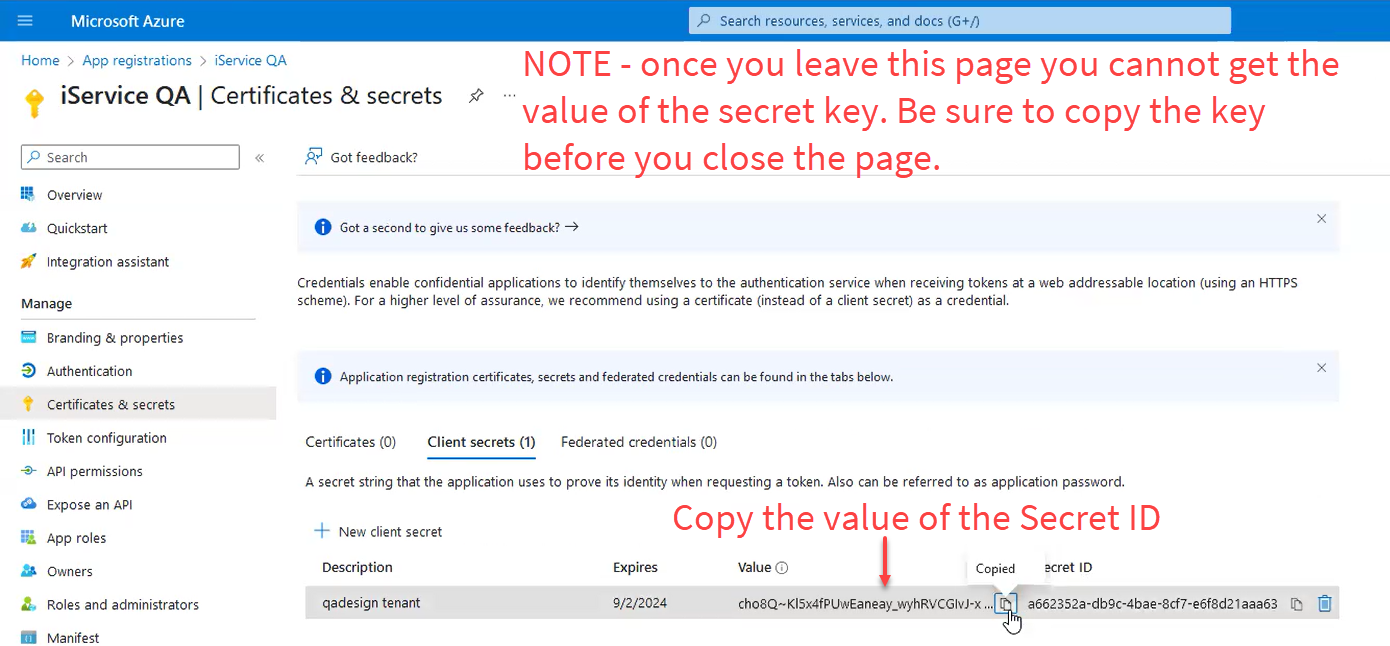
To obtain your secret key for the application, click on Certificates and Secrets and then Client Secrets. Then click on New Client Secret to create the secret.
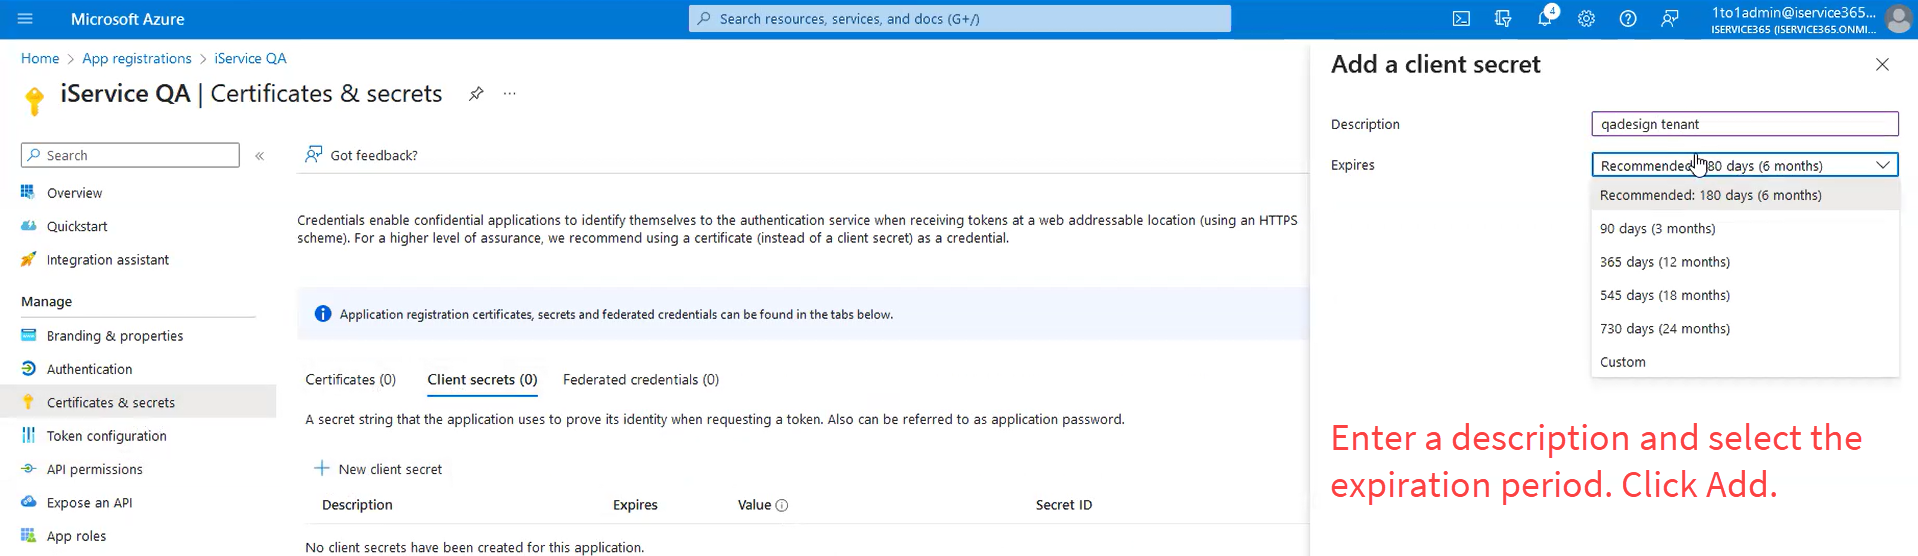
Enter a short description for the secret and then select the expiration period. Be sure to note the date the secret expires and create a new one before the expiration date.
After you configure the secret key and set the expiration, the key will be displayed.
To get the other two values, load the Overview page.
After you create your application, you should setup the proper restrictions to limit the access of the credentials you create to only the associated mailboxes. This is a separate step from creating the application in the process described above.
The steps are roughly as shown below.
1.Create a new app registration in the Azure directory for iService to use. In the app registration settings:
oIn the app registration API permissions page, assign this app the proper permissions. Then grant admin consent for these permissions.
oIn the certificates and secrets page, generate the secret key for to later plug in to the iService app
2.Define a "Mail-Enabled Security Group" in the directory and add then add the mailboxes they want us to have access to, to that group. For the example below, this group is called iservice@mydomain.com
3.Create an application access control policy that restricts the app created in step 1 to only have access to the mailboxes in the mail-enabled security group created in step 2:
New-ApplicationAccessPolicy -AppId <your-app-id> -PolicyScopeGroupId iservice@mydomain.com -AccessRight RestrictAccess -Description "Restrict iService app to mailboxes in the iService security group."
4.Create the mailbox in iService tied to the Azure app created in step 1, including the app id, secret key, etc. Ideally we'll have this part abstracted out in the iService admin panel by then though so that you can just define it once there, then reference in a dropdown when creating each iService mailbox.
 Creating Azure credentials for iService