When setting up a workflow form or answer panel, the Workflow Builder will prompt you to map various elements.
Mapping simply means specifying how and where the information should be stored in iService®. For example, when creating a new interaction property, you’ll be asked to map it to a configuration—such as text, number, date/time, or another supported data type.
Below is a list of all configurations in iService®'s Workflow Builder that require mapping:
1. Templates:
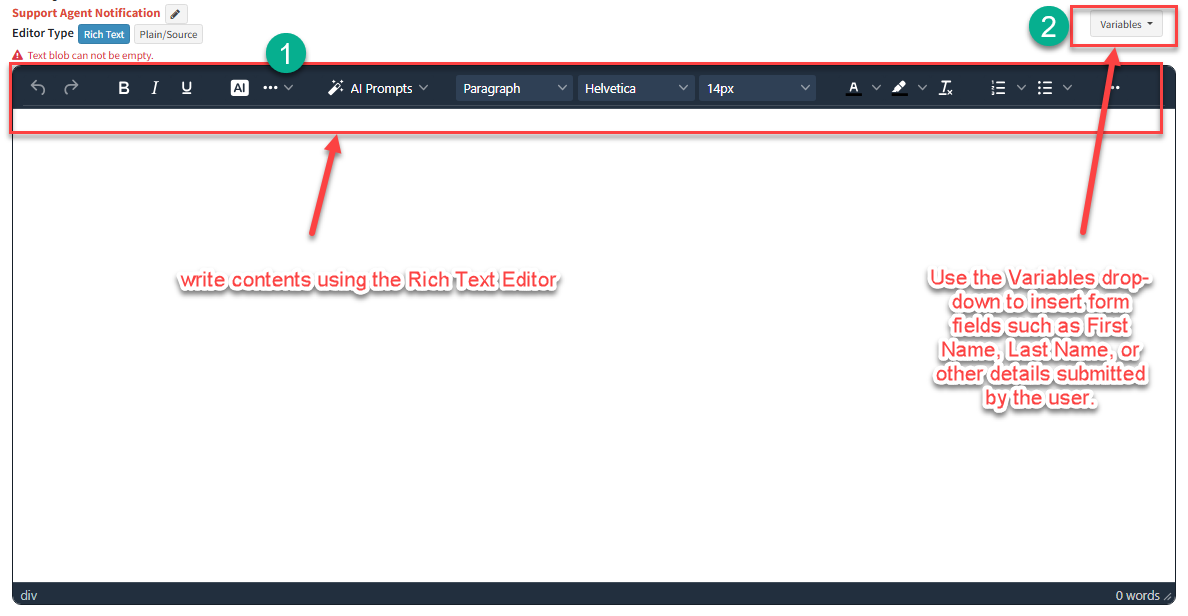
When creating a template in iService®, it's important to define its content.
To map a template in a workflow action, enter the template name (e.g., "Support Agent Notification") in the action that will use the template, then add the corresponding content under the "Templates" tab.
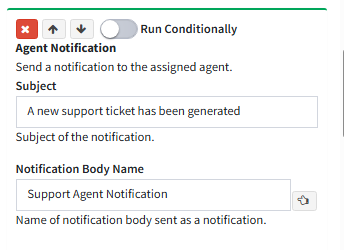
Once you've entered the template name, the "Templates" tab in the workflow builder will turn red, indicating that the template content still needs to be added.

Simply click the tab, then locate the template by its name—such as "Support Agent Notification"—to begin editing it.
You can access the full guide on creating, editing, and using templates here.
2. Interaction Properties
When creating a new interaction property—whether it's a Workflow Property or a Segment Property—the first step is to reference it within a workflow action. This automatically generates the property in the Workflow Properties tab. For example:
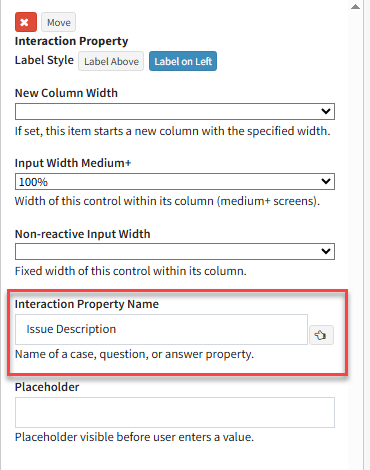
Once you've typed the name of your interaction property in a form or answer panel, the workflow builder will highlight the "Workflow Properties" tab in red, prompting you to map the property.

Click the "Workflow Properties" tab, locate your interaction property, and map it to one of the supported data types listed below.
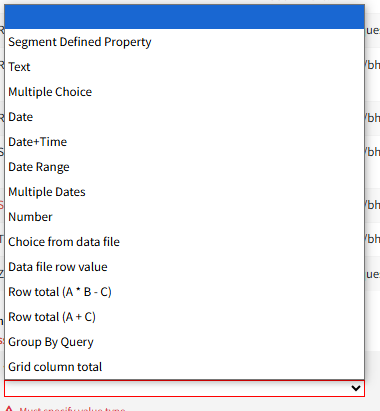
If the property should be mapped to a "Segment Defined" property, select "Segment Defined Property" from the list. iService® will then move it from the Workflow Properties tab to the Segment Properties tab and prompt you to map it to an existing property within a segment.

For more details, see the full guide to Workflow and Segment Properties.
3. Contact Properties
Mapping a contact property follows the same process as mapping workflow properties. However, once you've typed the name of the contact property in the contact property panel, it will appear under the "Segment Properties" tab instead of the "Workflow Properties" tab.
Note: Contact properties must first be created in the respective segment before they become available for mapping in the workflow builder.
See a detailed guide on Contact Properties here.
4. Segment Mapping
Agent Submit forms can be restricted to agents with access to a specific segment—for example, only showing the form to agents in the Technical Support segment.
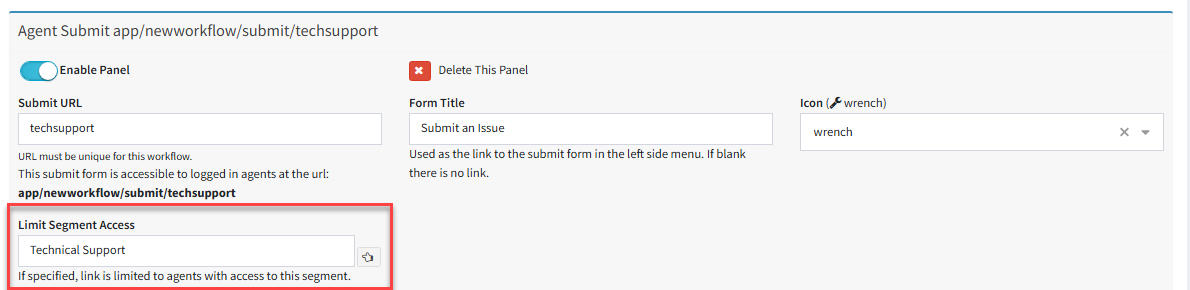
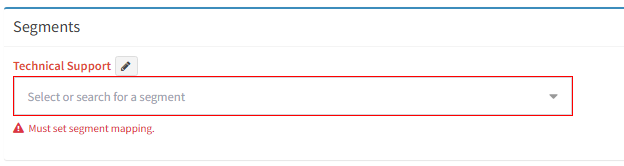
When you limit a submit form to a specific segment, the iService® workflow builder will prompt you to map the segment—such as "Technical Support"—to the corresponding segment accessible by the intended agents.
After entering the segment name, the "Segment Properties" tab will turn red, indicating that the segment needs to be mapped.
Click the "Segment Properties" tab, locate the segment, and use the drop-down to select the segment you want to limit the Agent Submit form to.
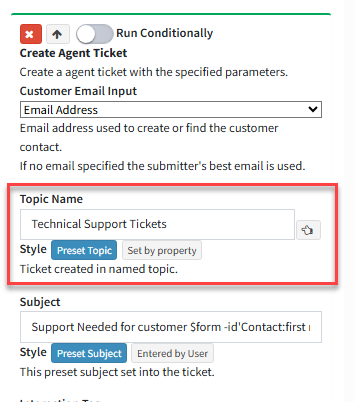
5. Topic Mapping
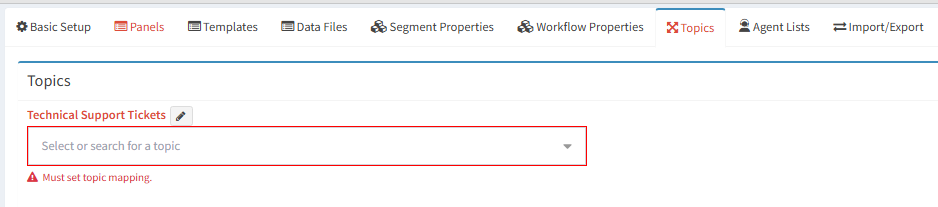
When selecting a topic for an action, you must first map it to the corresponding topic where the action will occur. For example, if you specify "Technical Support Tickets" in an agent ticket action, it must be mapped to the existing "Technical Support Tickets" topic within the appropriate segment in iService®.
(See Topics for more details on setting up a topic in iService®.)
After entering the topic name, the "Topics" tab will turn red, indicating that the topic needs to be mapped.

Click the "Topics" tab, locate the topic, and use the drop-down to select the topic where the ticket will be created when the respective Submit Button is clicked.
6. Mailbox Mapping
When setting up a notification action, the iService® workflow builder will, by default, use the segment’s default mailbox associated with the topic from which the notification is sent. However, you can specify a different mailbox if needed.
To do this, simply type the name of the desired mailbox in the "Mailbox" tab of the notification action, like so:
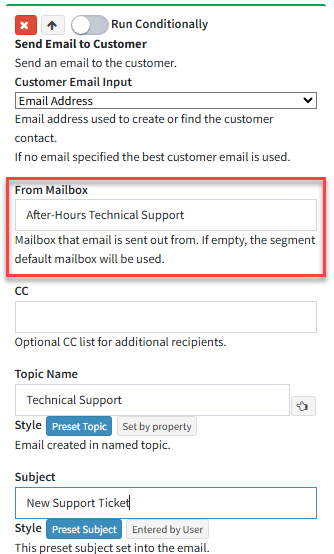
After entering the mailbox name, the "Segment Properties" tab will turn red(since this is a segment setting), indicating that the mailbox needs to be mapped.

Click the "Segment Properties" tab, locate the mailbox under the "Mailboxes" section, and use the drop-down to select the mailbox that will be used to send this notification.
7. Agent Lists
When setting up an Agent Picker, you must assign a list name to the Agent Picker element.
In the example below:
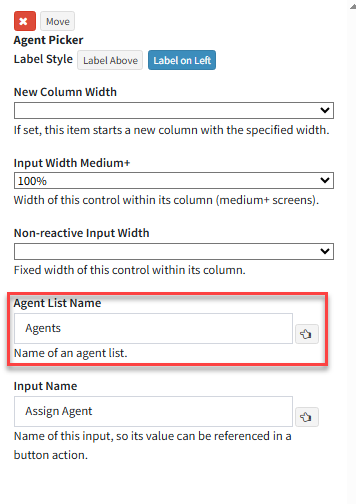
Once you've entered a list name, the "Agent Lists" tab will display the all agents in iService®, allowing you to add or remove agents as needed.
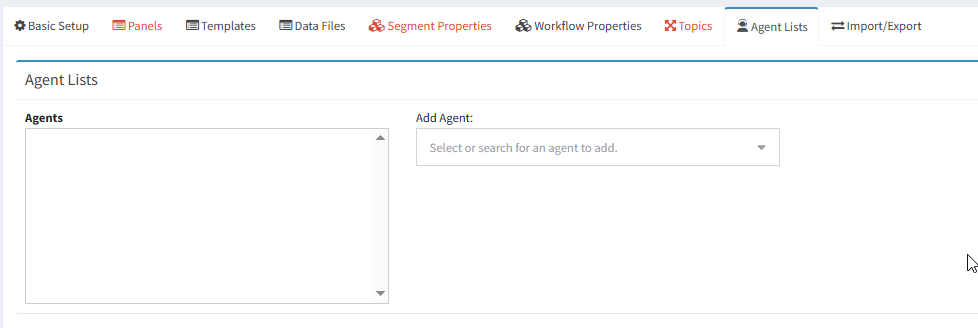
Add all agents who will support the use case for the Agent Picker—for example, a team responsible for handling escalations or reassignment scenarios.