![]() iService provides a built-in integration with Salesforce that allows you to synchronize contact and interaction data between iService and your Salesforce CRM. This guide covers the complete setup process, including configuring your API credentials, defining field mappings, and managing the sync process.
iService provides a built-in integration with Salesforce that allows you to synchronize contact and interaction data between iService and your Salesforce CRM. This guide covers the complete setup process, including configuring your API credentials, defining field mappings, and managing the sync process.
See the Server Processing Management page for details on enabling and disabling the Salesforce bidirectional sync after it is configured.
Configuring the Salesforce Connection in iService
In iService, navigate to Tenant Settings > External APIs.
Locate the Salesforce Configuration panel and expand it if it is collapsed.
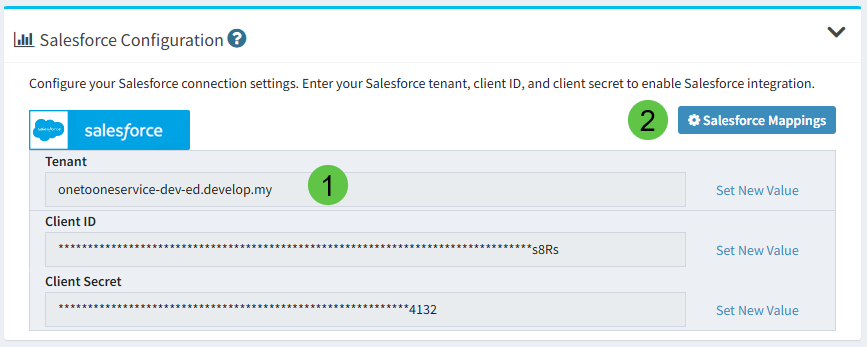
Enter your Salesforce connection details in the following fields in section (1):
Field |
Description |
Example |
|---|---|---|
Tenant |
Your Salesforce org's My Domain subdomain. This is the subdomain portion of your Salesforce login URL (e.g., if you log in at https://yourcompany.my.salesforce.com, enter yourcompany.my). For sandbox environments this will include the sandbox identifier (e.g., yourcompany-dev-ed.develop.my). |
yourcompany.my |
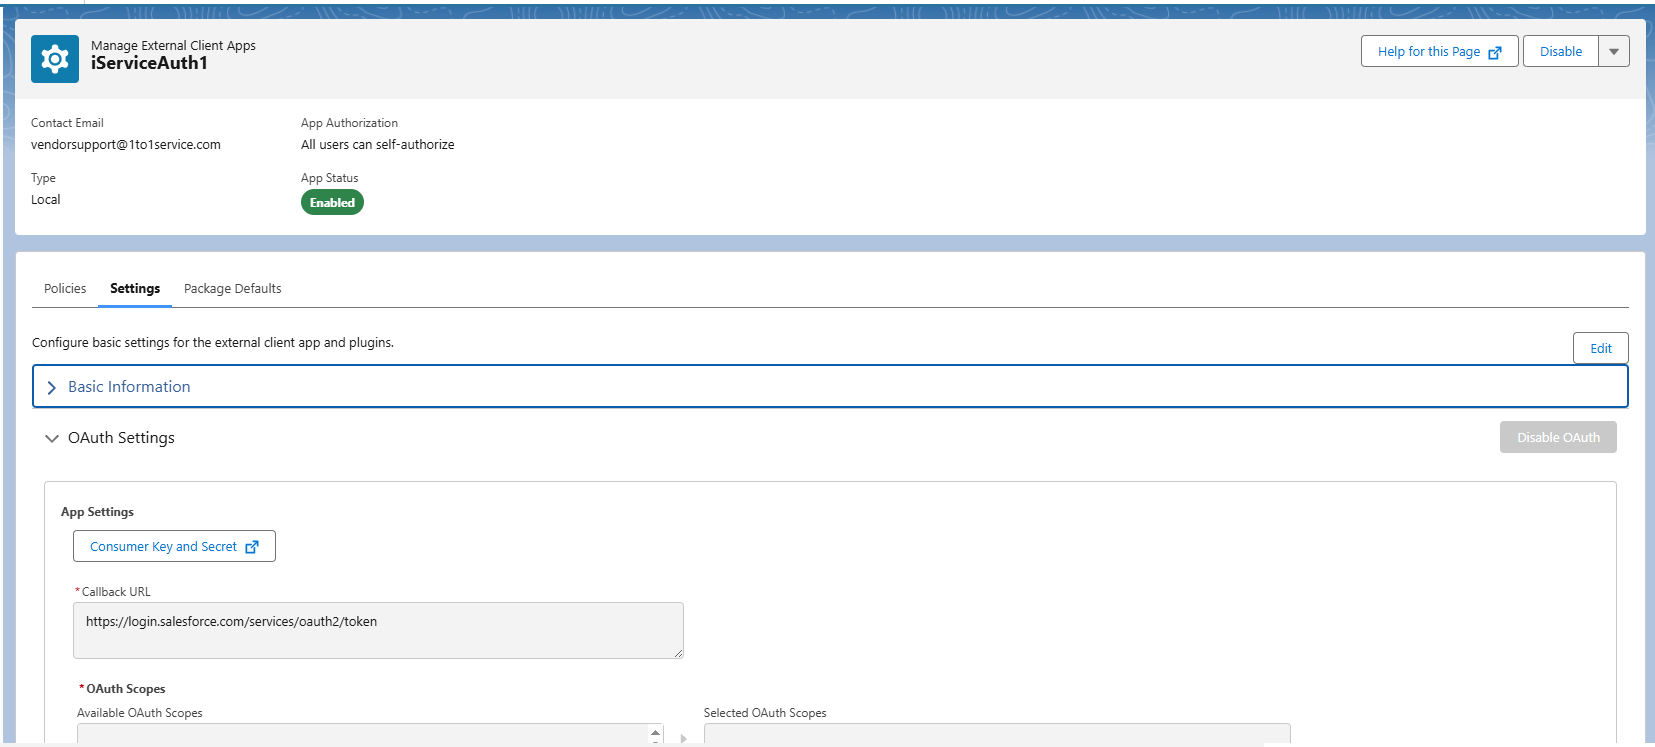
Client ID |
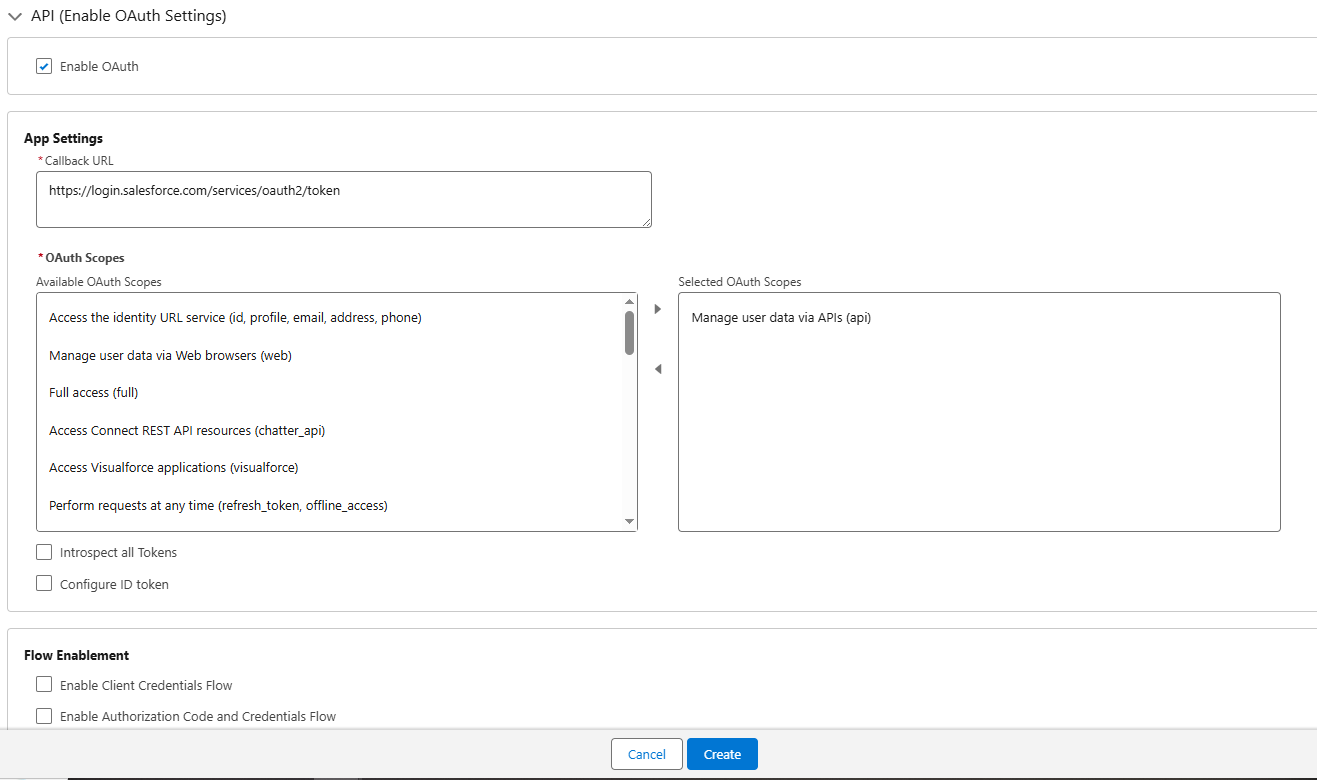
The Consumer Key from your Salesforce Connected App. |
(provided by Salesforce) |
Client Secret |
The Consumer Secret from your Salesforce Connected App. |
(provided by Salesforce) |
For each field, click Set New Value to enter or update the value, then confirm the change.
Security Note: The Client ID and Client Secret are stored encrypted and are masked in the interface after being saved. Only users with admin-level access to the External APIs page can modify these credentials.
(2) After you enter your values in the External APIs page, navigate to the Manage Salesforce Mappings page to configure field mapping.
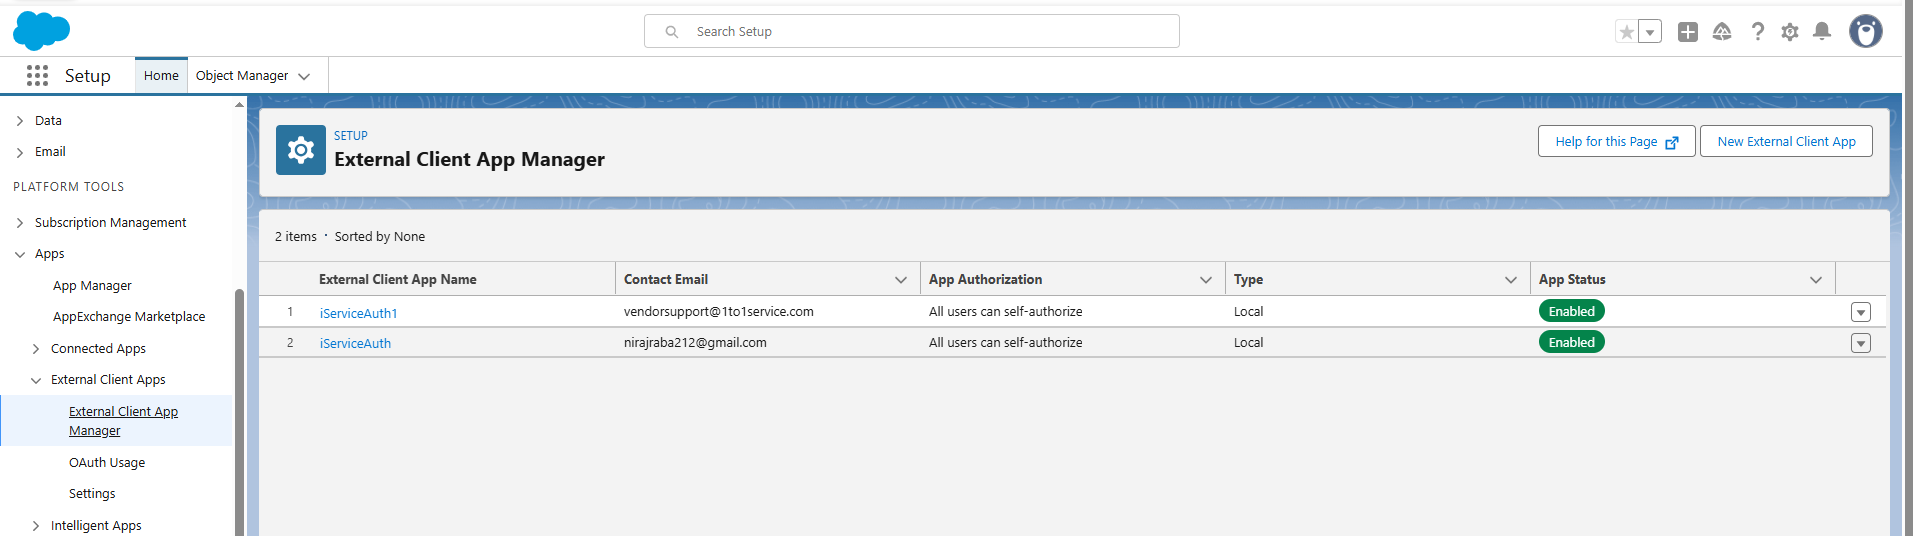
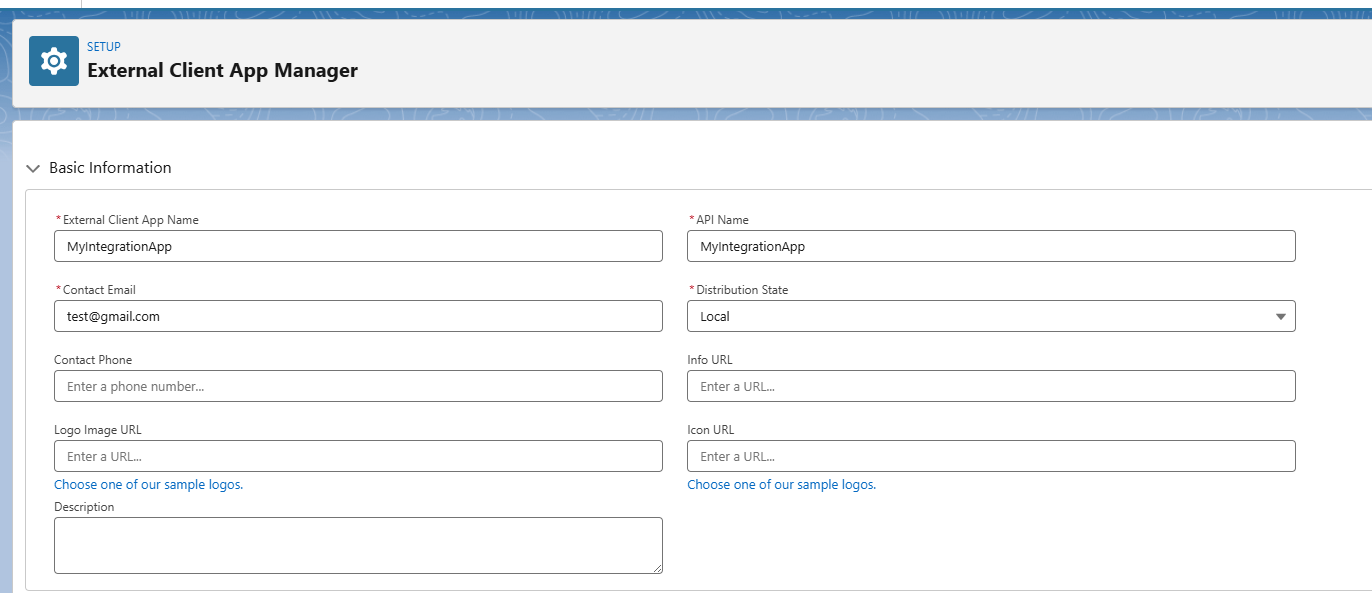
 How to create Salesforce credentials for iService integration
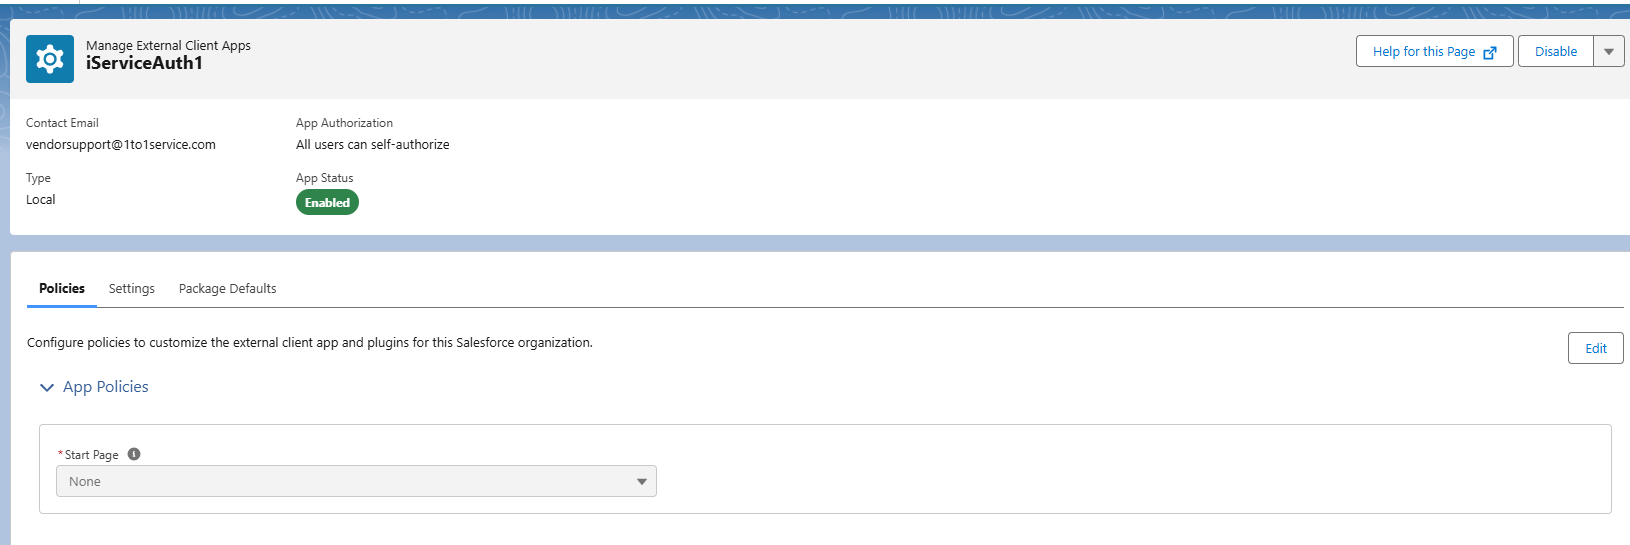
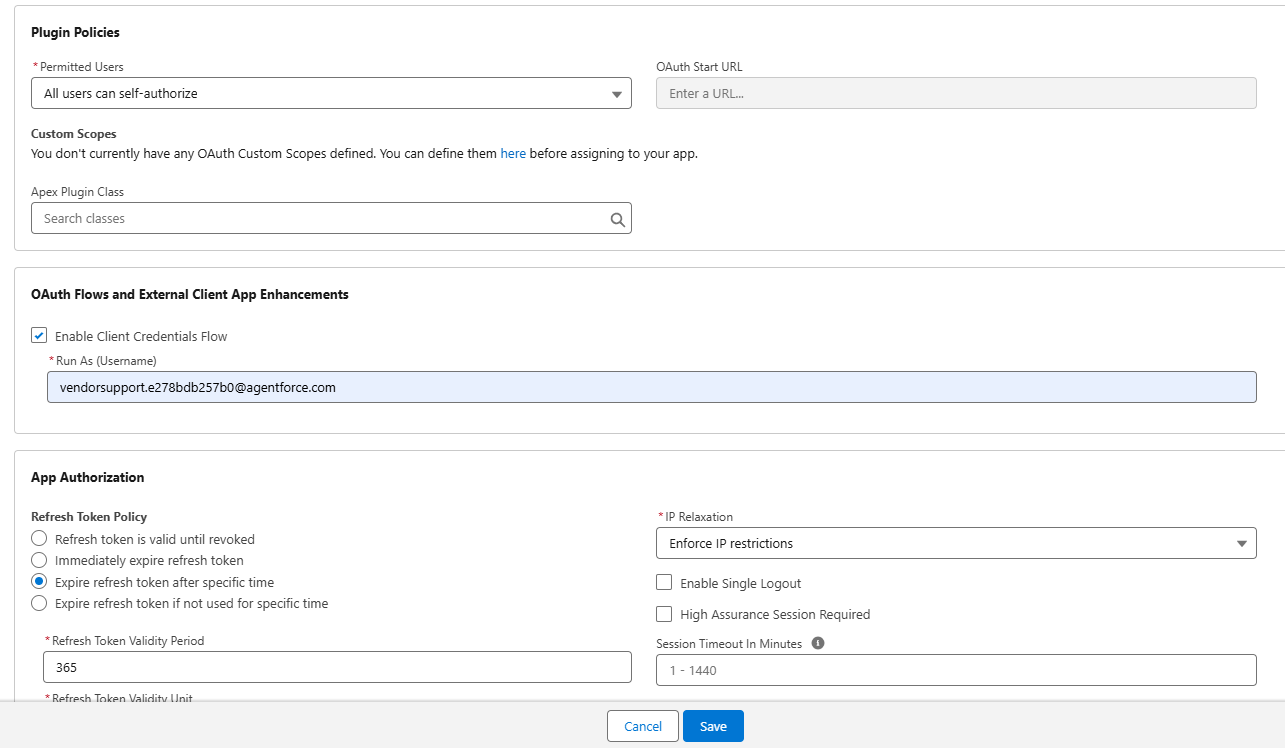
Configuring the Salesforce integration
Monitoring and disabling Salesforce sync